Archives for posts with tag: indiedev

Hi all, welcome to the Kana Quest devblog. For those who don’t know Kana Quest is the game I’m making. It’s an educational puzzle game that teaches Japanese. And because to be making a game about learning Japanese, I do need to be reasonably proficient at you know… speaking Japanese.

trailerWIP2

And so a few folks have asked me what my top tips for studying Japanese are (excluding Kana Quest of course). So, today we going to go over my top 5 tips for learning Japanese.

And just a quick run down about my experience with speaking Japanese. I studied Japanese during high school, and did it in my graduating year. From there I studied it at university. And then I went and lived in Japan for a year as an ALT (Assistant Language Teacher). In terms of JLPT, I’ve only done 4 (second lowest). But these days I would put myself somewhere in between JLPT2 and JLPT3. My vocab and Kanji being the things that are probably JLPT 3. But my speaking, listening and grammar are closer to JLPT2. So if you are JLPT2 or higher, maybe take everything I have to say with a grain of salt.

IMG-1340

5. Know Your Resources

The first bit of advice I would give you is to have a good knowledge of the resources available to you. But beyond knowing what resources are out there, when and how to use them. So some resources you will absolutely want to know are…

  • jisho.org – Jisho literally means dictionary in Japanese. It’s probably the best Japanese-English dictionary available to you online. It has lots of alternate translations for most words you search. But it also often has example sentences. Example sentences are so valuable, so pay attention to them whenever you can.
  • Google Translate – This is a little controversial, but if you are using this exclusively to look up one word, usually its pretty good. Not as good as jishi.org, but it is faster. So if you’re trying to remember a word you’ve already learned, or check the kanji for a word you know, its great. Just be aware that google translate can mess up, and can easily lead you astray especially if you are in unfamiliar territory.
  • Kodansha’s Essential Kanji Dictionary – If you are studying Kanji… this is going to be your best friend. I got mine in high school and I love it dearly. This probably isn’t something you want to get if you are a complete beginner. But if you are starting to read more manga or light novels and you don’t know a character and it doesn’t have Furigana, this will save your butt.
  • Dogen’s Patreon Series – This is here for one function and one function alone. If you want to improve your pronunciation, there is no better place to go. I do have some caveats. Dogen emphasises studying exclusively pronunciation above all else. I personally do not recommend this. I personally think you need to study grammar, speech patterns, vocab as well as pronunciation. And becoming aware of the nuances of Japanese pronunciation when you start learning is much better than after you’ve picked up a bunch of bad habits.
  • Textbooks – Personally I only really have experience with the Genki Textbook series. Personally I really liked it, I think it does a good job of explaining Japanese grammar. But I really like studying grammar patterns a lot, so if you don’t… your mileage may vary.
  • Japanese Ammo with Misa – If you hate textbooks, give this youtube channel a go. She covers a lot of the basic grammar very well, as well as vocab. Though she certainly more focused towards beginners than more advanced learners. She also does a good job covering a lot of common beginner mistakes.
  • Nihongo no Mori – Another youtube channel. This one is much better for learners who are comfortable with listening to Japanese with very limited English. They also do excellent grammar, kanji and vocab recap video’s to help you prepare for the JLPT (Japanese Language Proficiency Test). If you are an intermediate or advanced learner, I cannot recommend this one enough.
  • AnkiApp – Sooner or later you’re gonna have to do a flashcard. Anki is probably the best flashcard app. So why not use it? It’s free, its really flexible and it does a good job of tracking your progress. But just be aware that flashcards are only really good at getting a thing in your brain. Not how to use it. Make sure you give yourself the chance to apply the words you use with the flash cards.

jjmbt047-img600x450-1511577783c3hafx19895

4. Avoid “Learning by Anime”

This is not a hard and fast rule, but 95% of the time, when I see/hear someone say I’m going to learn via anime, it usually ends with them either A. not really learning any Japanese, or B. learning to speak “Anime Japanese”. Both are problematic. This is not to say you can’t use anime as a learning tool. But like all tools you have to know how to use it.

If you want to include anime as a part of your study regime, good! Do it. But operative word there is “part”. It can’t be your only method of study. And remember, while it is probably more enjoyable than normal study. It is should still be study.

So lets go over how you actually use anime to study. The first thing you need to do is pick a show. And there is a wrong answer to what show you pick. Do not pick something that doesn’t depict daily life or lots of average conversations. That means you should avoid most shonen anime. The reason is, a lot of shonen anime involves a lot of fight scenes and magical terminology. This results in a lot of characters using language you just will not use in real life. For example in almost any shonen anime, someone will use the word “kisama”. Which kinda means bastard. But you do not use that in real life. Even if you wanted to insult someone, you would not use kisama. You would use “temee”. Which you still wouldn’t use because you don’t want to lose all your friends. You see my point here right. Often times anime uses highly stylised language to add to the drama, this is great for theatrics… but terrible for you learning. So stick to anime that focus’ on daily life interactions. Or better yet, drop the whole anime thing and just watch Terrace House. It’s basically ALL daily life interactions and you get a much better idea of how people ACTUALLY talk in Japan.

So now you’ve found a suitable show, you are going to want to turn off your English subtitles. You heard me. There have been quite a lot of studies based off watching TV and movies if foreign languages, and if you have subtitles in your native language turned on, you’re going to learn basically nothing. Instead, you want to turn on Japanese subtitles. This will give you a visual, as well as audio ques to each word you are listening to. Another reason Terrace House is amazing is that because it’s on Netflix, you can turn on Japanese subtitles REALLY EASILY. Finding Japanese subtitles on CrunchyRoll or Anime Lab is just not going to happen.

Now… Finally you have a show, you have Japanese subtitles turned on. You can finally start watching. Wait did I say watching? I meant studying. You are going to listen to each and every sentence being said, and you are going to stop every time someone says a word or a sentence you don’t understand. You are going to write down each word you don’t know, find out the meaning, re-watch the sentence again and again, until you get what is being said. I also recommend parroting back one characters lines as you do this. Try to copy their inflections and speech patterns as much as possible. This is good for your pronunciation, as well as your ability to understand. Turns out the brain picks up language faster if you speak it out. Keep doing this till the episode ends.  When you start doing this, a 24 minute episode will have taken you about an hour. You will get faster the more you do it, but this is not clean uninterrupted viewing. You’re not going to be able to binge watch a show because you’re concentration is going to be shot by the end of one ep.

And remember, this is not a beginner friendly study method (in my opinion). So if you’re struggling with it, maybe give this another go when you have a bit more practice up your sleeve.

And sides….

World8-9Transition

3. Why Watch Anime, When You Have JPOP?

Seriously though, this is my secret technique for getting better at Japanese. You do everything I just explained for anime, but you do it for a song. And its so much better for a bunch of reasons.

  1. Songs are way shorter and require much less of a time and energy commitment.
  2. You can find kid’s songs that are way more beginner friendly than most anime. And even if you found a kid’s anime that was at a beginner level, you probably wouldn’t enjoy it. But you can find some Japanese kid’s songs that are honestly really listenable.
  3. Music helps you memorise things better, especially if you are an audio learner.
  4. Singing along is lots of fun, and when you go Karaoke, you get to impress people by the fact that you can sing in Japanese.
  5. Because the language in songs is poetic by its very nature, it exposes you to non typical sentence structure. This is good because it allows you to comprehend and parse more complex ideas, and grammar structures when you encounter them outside of the song.
  6. Finding the Japanese lyrics is way easier than finding Japanese subtitles for an anime.
  7. WAAAAAY more choice of stuff you can listen to that will suit your taste. If you watch anime, you are basically forced to watch stuff that focuses on daily life. And if that isn’t your cup of tea that sucks. But with music you can listen to whatever genre you like.
  8. You can listen to music on the way to work/school so you can listen to it and revise things while just listening to music.

The main drawback from listening to music is that you can’t expect to use phrases you learn in song in daily conversation. But I promise you it will help in so many other ways.

But as much I’m raving about using music as a study tool, once again. It is one thing you should do as a part of a good study regimen. And while you can use it to practice many key language skills (Vocab, grammar, pronunciation, listening) and adapt it for whatever you’re weak at. You do still need to spend time speaking, reading and writing in addition.


2. Find a Way to Speak Japanese

I mean, I know this is a bit of a no brainier. But the ability to speak with other people in Japanese will help so much. But finding a place to speak can sometimes be challenging. So here are some ideas of places to look for a conversation group.

  • At a local university. I know my uni has a Japan Club and they do a weekly conversation meet up. From my experience of university clubs, they usually don’t care if you don’t attend the university. They mostly care that you pay a membership fee which is once per semester. While I can’t tell you how much every club would charge, but at mine it was $20 per semester.
  • Try to find people in your area who want to practice. This option I would usually only recommend for folks who are more experienced because non native speakers can’t correct your speaking like a native can. So you will pick up bad habits if you do this too early. But if you’re an intermediate learner this can absolutely be a valuable tool to help you improve.
  • Conversation Classes. This is an option that is only really available if you have the cash to do it, but it is a really good thing to do. Even going once every two months is better than never speaking at all.

712px-Sakura.song


1. Consistency is Key

Yeah, yeah I know this is an obvious one but get over it because you need to hear it again. Doing 5 minutes of study a day is better than 35 minutes of study once a week. Yeah that 35 minute study session would be good too, but consistently getting your brain to process the language you want to learn is the most important thing you can do.

And that word, process is the important thing to remember. Often you hear folks say “Oh you need to immerse yourself in a language to truly learn it”. But honestly immersion is overrated. When I was living in Japan I didn’t have time or the energy to listen in and process everything that was being said around me. So I didn’t improve all that much. Certainly my speaking got better, but my vocabulary and the grammar patterns I knew, stayed mostly the same. Whereas when I was consistently processing new words and grammar patterns and then applying them back in Australia, I improved a lot more. Maybe you’re lucky and you can pick up meanings and grammar from context really well… But that ain’t me.

So for the end of studying consistently, find the study that you enjoy most. If you like reading, buy some Japanese novels on your phone or kindle. And use that as your study tool. I’ve told you the study tool that I like the most: Music. But that’s only the tool I like the most because its the tool I can engage with most consistently.

Maybe the thing that gets you going is performing. If that’s the case, maybe doing speech contests (a lot of Japanese embassies have annual speech contests) could be the thing that motivates you. Maybe you like drawing a bunch. Then you can do calligraphy to learn kanji as a tool to motivate you. Or you could order some Japanese art magazines (and boy howdy do they have some amazing art magazines) and the desire to learn new techniques is what pushes you to translate each page. My point is, find the thing that allows you to practice as often as possible, that you enjoy, and use that to keep you going.

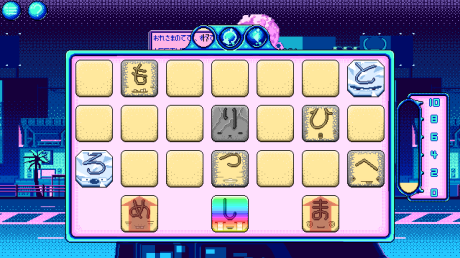
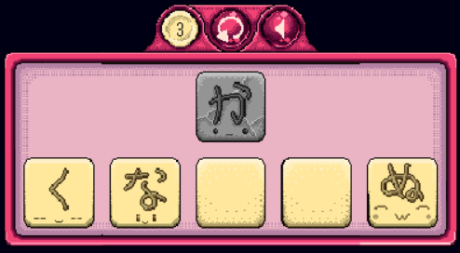
And it is with this principle in mind, that I made Kana Quest (That’s right we are bring it home). I know a lot of folk hate learning the Hiragana and Katakana because the only way to really learn it at the moment is a lot of rote learning. Which is boring and hard to do consistently over a long time. So I figured, what if I made something that people could do consistently until they knew Hiragana and Katakana, and that way they can start doing these other forms of study which while are way more fun and interesting… are also not beginner friendly.

IMG-1257

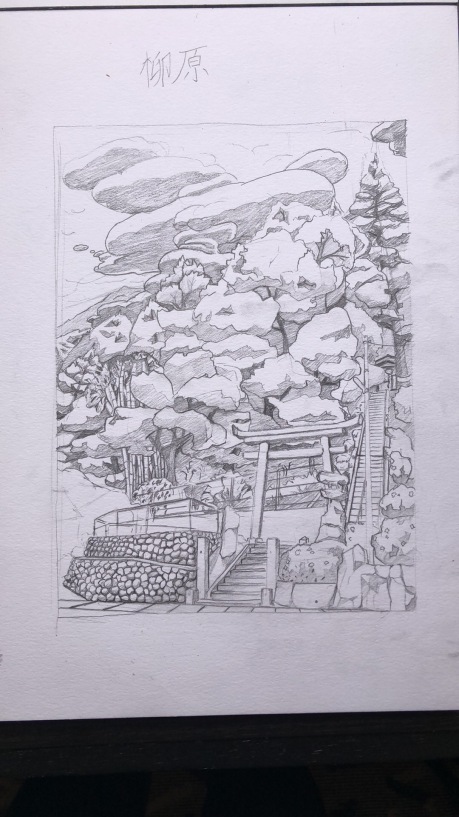
A drawing of the shrine entrance next door to where I lived in Japan. (Kanji says Yanagihara)

Wrapping Up

Anyway, that’s this month’s devblog. I hope you enjoyed it. If you found these tips helpful, please share the devblog and wishlist Kana Quest on Steam: https://store.steampowered.com/app/725850/Kana_Quest/

Here are all the relevant social media links if you feel like following.

Until next time, hope you have a great month. Happy holidays, and a wonderful new year.

IMG_1835


Good morning everyone! This month’s blog is a little sideways turn from our usual venture… written by Julian AKA ‘Zorsy’, one of the composers for Kana Quest. This is so Theo gets a good rest, and so he can tell us more exciting developments behind the scenes hehe. 

It’s been an amazing venture so far being contributing to some of the music for the game alongside the talented Leina https://twitter.com/rein_bel

One very fun challenge composing for the game has definitely been realising the worlds that Theo has created through various forms of traditional music. We’ve swayed through Enka, Ghibli, to more recent JPop. All of which have provided their own unique challenges in relation to soundscapes, samples and the cohesion between traditional Japanese genres, a chip-tune canvas and the individual flares of both myself and Leina! 

I think embarking on the project, neither of us were quite sure where we would end up, but with the majority of the music completed by the time of writing, i’m definitely quite happy with where we’ve ended up! I’ve written a list of some of the more fulfilling challenges to overcome.


Background Research

Coming in fairly recently to the project, It’s been awesome to be part of Theo’s vision, as the idea of utilising the tutelage of hiragana/katakana within a Bejewelled Puzzler type of game really appealed to me as i loved problem solving games and am currently studying Japanese myself (Which reminds me after this blog…). However that did involve a lot of research into the game and world that was to be created, and I often found myself delving into some older Japanese styles that I hadn’t been quite familiar with: 

https://www.youtube.com/watch?v=nvvXOfLs-ng

Here was one of the examples of styles Theo was looking at. Whilst the musical brain within me was quite familiar with harmonies and melodies and the ability to recreate them on the piano, I was not initially familiar with traditional Japanese instruments such as the Shamisen/Koto/Shakuhachi at least from the angle of a composer to utilise them! Early on me and Leina had decided that more of these traditional sounds might best be best approached by her, especially for intricate articulations. Here’s an example of some of Leina’s beautiful music: 

Within this challenge, I think there have been many instances where I’ve been faced with a problem such as “this chip-tune element sounds too out of place amongst the traditional instruments” or “how do i make that percussion sound not too aggressive?” as well as “how do I make that percussion sound more aggressive” and the next thing you know, some of the most simple of tasks takes a very long time or the complete opposite! 

Some of my favourite contributions to the soundtrack so far have definitely involved a very large track listing, so one of the best skills I’ve picked up so far has been efficiency in how you layout your workflow!

https://www.instagram.com/p/Bz_vC9JBiM0/?utm_source=ig_web_copy_link


Cohesion

We’ve taken a progressive approach to the soundtrack in which the worlds take a (for the most part) chronological approach to it’s production. So we start from Traditional and Enka music, to eventual heavier more AMV OP Japanese Pop music. Whilst throughout every piece will always feature touches from both composers, you can see the early part of the soundtrack composed by Leina, which morphs into a more modern production style composed by me! It’s been really great to see how our styles have all matched with future stages adopting little callbacks to traditional Japanese instrumentation but retaining it’s energy receptive to the world it accompanies. 

WORLD 9 Music

https://www.instagram.com/p/B0SEOodgPqg/

I think where we are now, one of the amazing parts of how it’s been composed is that you can hear both of our styles fusing together, and in fact I’ve definitely learnt a lot from having Leina next to me composing on the game! 

Mobile Composing

This applies to all of us to some degree, but I know one of the biggest challenges especially on my behalf has been composing whilst travelling! Upon starting this soundtrack, I was in Japan myself, but travelling for the majority of May – July definitely was a challenge! As a methodology, most of the time I compose with a piano, and write on the piano, but there were many instances where I’ve written by singing/by hand/by computer or if luggage permits me, travelling with this miniature buddy of mine:

https://www.instagram.com/p/Bz9cCk_ABsh/?utm_source=ig_web_copy_link

Based on methodologies prior to taking on the project, this has been a very enlightening endeavour limiting myself to barely working from my nicer studio back home! Whilst majority of the mixing is still done on my speakers back home, it’s been really inspiring writing whilst i’m on the go, and I do believe some of what I’ve been able to conjure wasn’t possible whilst being in Australia. Creating limitations has always allowed me to grow in another area, and so far I’ve composed from the comfort (or discomfort) of:

  • A couple of friends houses
  • On the plane
  • On the train
  • In my hostel
  • In my bed
  • In my Capsule hotel even. (yes don’t tell Theo) 

*Theo here, Julian. You know I read this right :P* 

There’s still some music left to go, and whilst on my end the composing side of the music making is very close to done, it’s awesome hearing the whole soundtrack come together as well as hearing it get pieced together is a really satisfying experience! 

Time to study Japanese… with Kana Quest… 


*Theo here again, please give a warm thanks to Julian for this month’s Kana Quest devblog, by following him on twitter – https://twitter.com/ZorsySan and instagram – https://www.instagram.com/zorsysan/ .

Next month we are going to have Leina in and talk us through some of the finer points of working with traditional Japanese elements.

If you are interested in following Kana Quest feel free to sign up to the mailing list at kanaquestgame.com 

Until next time, take care and have a wonderful month*

Well its been a month. A whole lot has happened. But most importantly as I’m writing this… I am in Japan. The place where Kana Quest began. So this month we are going to look at my journey through Japan and look at some of the places that Kana Quest drew inspiration.


First up is the flight over. Not too much to talk about here, but the first stop in my travels was Cairns. Can’t get to Osaka without going through it. But I had enough time in my lay over to get some work done on Kana Quest, and charge all my devices up again for the next leg.

Speaking of the next leg, I got off at Osaka. Now I don’t mean any disrespect to Osaka. But I am honestly not a huge fan of Osaka. I personally have never really enjoyed myself any time I’ve been there, so I got off my plane. Headed straight to my hotel. Passed out. And got on a train to Kyoto the very next day. Which is good because in Kyoto was one of the main reasons I was in Japan: BitSummit.

IMG-1094So I tried to exhibit at Bitsummit this year, and unfortunately I was not successful. But I did decide that it would be worth heading over there and meeting some new people, playing some sweet new games, and learning some new things. I do want to give a shout out to Andrew (@DigDugpa), Shawn (@auberginenasu) and Lena (@Crowbeak) who took took me under their wing and introduced me to folks. The show was really cool and there were some really sweet games, and there was a surprisingly large amount of Aussie devs there. There was Necrobarista, Unpacking, and Frog Detective. The dev for Rising Dusk; Lukas Stobie was also there.IMG-1095 (1)

But once the show closed on Saturday, it was time for a Bitsummit tradition… The River Party. Devs, volunteers and attendees converge down on the Kyoto riverbank and just chill. Now the photo below is what the river bank usually looks like…IMG-1097

And this is what the riverbank looked like with all of us down on it.

IMG-1099 (1)

It kind of amazes me that we had a group of people this large (most of whom were drinking), and the cops were not called. I mean no one was doing anything awful, but a group of folk that large is going to be loud. And I can only assume that it eventually got annoying for the locals who were just trying to walk along the river bank.

But all good things come to an end, and so did Bitsummit. But I still had a bunch of time in Kyoto. So what did I do? I went to tourist destinations and drew.

Pictured above is Arashiyama. The place where that iconic bamboo grotto is. But I have always loved this view of it, from the outside. There are way less people, and its still just as beautiful.

I also went to Kiyomizudera. Which is the most iconic Buddhist temple in Japan. Unfortunately for me the temple its self was under restoration so it was covered in scaffolding.IMG-1128

But fortunately for me, I actually went there primarily for the sake of seeing all the small little alley ways that lead up to the temple. See Kyoto is one of the few places in Japan where you can still see traditional Japanese buildings still in good condition (you can see them in rural Japan, but they are often a bit run down). And let me tell you, the alley ways leading up to Kiyomizudera are just stunning in their own right.IMG-1123IMG-1125

I mean just look at them, they are gorgeous. I wanted to do a world in Kana Quest that referenced these alleyways, but due to the parralaxing backgrounds it would have been near impossible to execute them in a way that would have looked good.

Once I finished mucking around in Kyoto, it was time to go home. And let me tell you, home had not changed one bit. It was exactly as I remembered it. The clouds were even doing my favourite thing where they covered the tips of the mountains. Of course when I say home I mean where I lived. A small town called Wadayama in the dead centre of Hyogo prefecture. Below are some pics of my neighbourhood.  

If you were wondering where the first four worlds of Kana Quest came from, this is where they came from. While they don’t look exactly like the real world inspiration, what was more important to me was that the worlds made me feel like I was back here.

But then we have the cherry on top of my nostalgia sundae. The shitty box I lived in for a year. Now the pics just below don’t look that bad… that’s because the moment I moved out. They gutted the insides, repainted the outside and landscaped the surrounding area. Because let me tell you, when I first got there, there was mould everywhere, there were spider webs in my stove top grill, there was a large plastic bucket where a shower should have been (actually that one never got fixed while I was there), and the fridge that I had been left was not working…. And yet… god it was good to be back home.

Also, see that car parked in the third picture? That’s where I used to park my car. But something you cant see so easily is that there is a full two feet drop on the left hand side of that car. So driving into that thing was terrifying because if you messed up… your car was gonna end up on its roof.

IMG-1257

I also decided to do a drawing of the little park next to my home. When I moved in one of my coworkers asked me if being next to the shrine bothered me. She didn’t understand me when I said that I quite liked it because she thought it was scary. Still to this day I think I was very lucky to have something so beautiful next to where I lived.

Now this is starting to get a bit long so I might start wrapping it up. But before I do we are gonna do a few last rapid fire pics and what they are and why they are important.

IMG-1333

My fav Pokemon gets its very first official plushie from the Pokemon Centre, and I am so stoked.

IMG-1328

The Hiroshima Genbaku Dome. I was planning on drawing this one, but when I got there I found it a bit too upsetting to draw. Especially when you look at the pictures of the immediate aftermath and you can see the landscape around you as being nothing but complete devastation, I just found it a bit too much.

IMG-1303

The neighbouring prefecture to my Hyogo to the north west is Tottori prefecture. Which has the honor of being the least populous prefecture in all of Japan. What does it have? Honestly not a lot apart from a lot of natural beauty and sand. Seriously look at these sand sculptures at the Tottori sand museum!

Finally, I have actually been getting some work done while I’ve been over here (I know it doesn’t look like it). Unfortunately most of it isn’t ideal for showing off. But the art for the final mechanic in Kana Quest is now finally implemented. KanaVeyorBeltFinished

In terms of other Kana Quest news, our composers Julian and Leina are working damn hard on the music and I cannot wait to share it with you. And I might get them to write a devblog in the future about what they were trying to achieve with their music.

And with that, that’s all I got for this month. We are going to keep working hard on Kana Quest as we get ready for release later this year. I’ve had a few folk ask me if there is anything they can do to help the game leading up to release. And the answer is pretty simple, tell your friends about Kana Quest. You telling your mates to get excited for this game will do more than anything I do here on this devblog.

Until next time. Take care all!


Hi all,

It’s the second Saturday of the month which means its time for a now Kana Quest Devblog! Last time I said we were going to unpack several choice levels from the game, and what makes them good levels. And that’s exactly what we are gonna do. So

Now if you’re new here, Kana Quest is a cross between dominoes and a match-3 game that teaches you to read Japanese. You match sounds between letters, and when all letters are connected the level is complete.

GoodLevel1.png

This is the fourth level in Kana Quest and is the first level that consistently stumps players. Up to this point levels have been made to get the player used to moving Kana around, and understanding that stone Kana can’t move. This is the first level that actually tests the player’s understanding of how Kana match. So, how is this achieved? It is achieved by asking the player two simple questions; “In what order do the three movable letters need to be in so they all match?” and “Now that I have the order of the three movable Kana, how do I position them so that the one stone Kana also matches?”. These might seem like very simple questions, but there are a few factors that make them a lot harder than you might suspect. The first thing is that, this is the first time the player has had to order 3 Kana. Second is that all of the Kana have been deliberately placed so that the player has no matches, this means they are effectively starting from scratch. Thirdly the number of potential configurations is way higher than all levels up to this point. Finally, because the stone Kana is placed in the centre of the board, it means there are a total of 4 different correct solutions. But it doesn’t guide the player to any of those solutions in of its self. This forces the player to pay attention to the sounds of each Kana, and use that information to solve the level. Not use the shape of the level to tell them the solution. This is not to say that using the shape of the level to guide the player is a bad thing. It usually is a great thing to do, especially for more complex levels. But the purpose of this level is to test the player’s understanding of how Kana match.


GoodLevel2

The next level I want to look at is the final level of world 3. So where the previous level was testing the players understanding of how kana match, this level is testing the players understanding of one directional kana. One directional kana, are a lot of fun to play with because of how the restrict the number of potential arrangements of the kana. This is useful because it can be used to signal to the player the shape of the solution.

This level is set up so that there are only 5 possible positions for each row that could be the correct position. This helps the player start with a very strong sense of how to solve the level. But there are two curve balls in this level. The first is the one normal Kana (の) at the top of the level. Because this kana could potentially go anywhere in the level, the player has figure out how to best utilise it. The second is the one directional す on the right of the level. This says to the player that one of the three rows to the left of it need to be all the way over to the right, but you need to figure out which it is. When these two elements are mixed with each other they create an ideal puzzle. A puzzle where the player has a strong idea of their goal, but they still have to work for it. One last small detail from this level that I like is the blank one directional kana. These serve to prevent the player from trying red herring solutions. Red herring solutions are fine to have, but each red herring still needs to lead the player towards the solution. If a red herring just leads the player down the wrong path and leaves them at a dead end, you need to get rid of it, as it will only aggravate your player.


GoodLevel3.png

So for the last level that I want to talk about today is from the ninth world. If the first is an example of a good introductory level, and the second was a good intermediate level. This is a good hard level. So what makes this a good hard level? Well, honestly the same thing that’s made the previous two good; You know what your goal is, but you don’t know how to get there. This level achieves this with the り in the centre of the level. Because it is central, and it cannot move because it is a stone kana, the first thing the player will do is look for the other kana that match with it. In this level there is the transform kana (the rainbow coloured one), the ice ろ, and the paralysis ひ. The paralysis ひ has to end up to the right of the り because it can only be moved once before turning to stone. This leaves three spots left for the ice ろ. This puts the player on a strong starting direction for the level. But the thing that makes this level so challenging is that because of how ice, paralysis and one direction kana work, if the player makes moves carelessly they will trap themselves and be unable to complete the level. Once again, the needed end state is easy to determine, but how to get there is the challenge. The only real difference between these three levels is that they make the “how to get there” part more complicated.

Anyway, that’s the Devblog for this month. Hope you enjoyed. I’ll be back next month on the second Saturday of the month. I haven’t figured out what the topic is gonna be, but ill figure something out. Until then, take care!

First thing’s first, I know I missed the January devblog. I’m sorry it wont happen again. But… it’s here now, and it’s a new year, which means this is the first devblog for 2019! This is going to be a big year for Kana Quest as this is the year we are going to release! Knowing the end is in sight is a strange feeling as I’ve been working on Kana Quest for the last two years of my life. But I hope you all will be there with me as we run headlong down this final stretch!

So what does this “final stretch” look like in terms of development? Well for me personally that means making all the levels. I had spent most of 2018 finishing the art and making all the visual assets, but in terms of gameplay, very little was being made. But now that I’ve finished all the visual assets and Reuben my programmer has finished programming in each mechanic, I am able to churn out levels very quickly. How quickly is that? Well since last month’s devblog, world 5, 6, and 7 now have all their levels made. Of course these levels still need play testing before they are 100% good to go, but they are playable, and reasonably balanced.

So, seeing as levels are all I have been doing this past month, I’m gonna tell you how I have been making them. And some of the weird things I have to pay attention to when I’m making levels.

The first thing I do when I start making a level is I figure out, how hard I want this level to be, and what kana I want the player to see.

flowchannel

Sorry if this is a bit too game design 101 here buuut… This is the flow channel. Flow is that feeling where you are in the zone. But getting the player into the zone requires very careful balance from the game designer. So something I’m sure you will notice when you play Kana Quest is that every three to five levels will build in difficulty, only to drop back a bit and then continue ramping up in difficulty.  The reason you do this, is that it’s just more fun for the player.

In Kana Quest there are a few different ways you can control the difficulty of any given level. They are:

  • The amount of Kana in a level
  • Size of the level.
  • Potential board state permutations
  • Number of potential solutions
  • Complexity of solution.

So lets go through each of them. And first up is the amount of Kana. So in my experience, you have a hard cap of about 14 -16 different Kana in a level. Why is this? This is because past this number, there is too much information for the player to comprehend. And personally, even I can’t process levels with this many Kana. It’s also a difficulty that isn’t a lot of fun for the player. Solving the puzzles is fun, recognising kana… not so much.

The size of the level like the amount of kana, also has a hard cap. This time its not so much about overwhelming the player though. The largest you can make a level in Kana Quest is 7×4. This is simply because if you make the level any bigger, it will not fit on the screen. I know that sounds silly, but due to the way pixel art works, there is no easy way to just “zoom out” without also causing a lot of pixels to bunch and stretch. But honestly, most of the time this is plenty to work with. If you are smart about how you construct things this is not actually as bigger constraint as one might think it is.

What I mean by “potential board state permutations” is how many possible unique configurations can be made in any given level. So for example.

These two levels have the same kana, and the same starting positions but the first level is significantly easier than the second because the number of possible configurations of kana has been significantly reduced. Forgive me if my maths is wrong but the level on the left has only 120 unique board positions, whereas the level on the right has 362880 unique board positions. And while an advanced player can see through all the unnecessary information in the second level, it doesn’t actually make the puzzle any more fun for the advanced player because in both scenarios, the solution only requires two moves. So while you are giving advanced players a disappointing level, you are giving new players a level that is so information dense they will almost always solve the level by brute forcing the solution. What I’m trying to convey here is that when designing puzzles you need to control the amount of possible states so that you can guide the player to the solution. Now for more advanced levels its fine to offer levels that are more open ended, but you do need to be very sparing with how you do so.

Next up is the number of potential solutions. This category is a tricky one as personally I feel as though levels with multiple solutions make the level harder, not easier. Why you might ask? Well because it means that your players are less guided towards the optimal solution. It means they are more likely to get caught on unintentional red herrings. It also means that if the player wants to get a gold medal for a level, but they have only ever completed the level using an alternate solution that is more move intensive than the planned solution, they could spend way too long trying variations on the “wrong” solution. Really this is a side effect of having too many potential board state permutations, but every now and again its fun to have levels that offer multiple answers. Lots of levels in Kana Quest only have one solution, and lots of levels have multiple, the important thing is using this technique intentionally.

The final technique that I can use to control the difficulty for the player is probably the most important one. And that is complexity of solution. If the solution only requires two or three moves, its not a particularly complex solution. This usually means that the level isn’t super difficult. However, completion critical moves increase the complexity. A completion critical move is a move that if not made, the level cannot be completed.  Of coarse this can then be balanced with previous techniques. For example.example3

This is a level from world 1. And is in my opinion one of the best levels in that world. This has a very low complexity of solution, but in contrast to the all the levels before it, it has a slightly higher difficulty. But that difficulty comes from a larger number of potential configurations, multiple solutions, and a larger level size. The result is a level that isn’t too difficult, but does force the player to stop and think about the solution. But as the game ramps up in difficulty, ramping up the complexity of the solution is usually the safest way of doing so. Why is that? Well, it means you can control the amount of information you throw at the player to a far greater extent. Remember, you don’t want to overload the player with information, if they do they just start brute forcing the puzzles and have a bad time.  So an example of a good level made by giving the player a complex solution is this level.examplesolution

The reason this level is good is because it requires a good amount of moves to complete, and there are only two completion critical moves required (using the Slime Kana on the correct Kana), and those moves can be executed by the player at any point. Whereas, here is a level that has gone way too far on the complexity of solution.example3

This level is way too hard and is to date the most difficult level I have made. And the reason is, that every singe move in this level is a completion critical move that requires being done in the exact right order. If you make one wrong move, you cannot complete this level. The fact that this level has a relatively constrained number of possible configurations is its only saving grace. And I wouldn’t be surprised if I remove, or rework this level before the launch of the game.

I think the real take away from this blog if you are making, or thinking of making your own game is; What are the different vectors for making a game difficult? Are there enough? Are there too many? What are the implications of using one of those vectors? What are the implications of using multiple of those vectors at once? How far can one push any and all of those vectors before a game becomes impossible? And most importantly, at any point in a game, what vectors of difficulty does the situation call for?

Anyway, these are the things that I’ve been thinking about for the last month or so. I’ll see you next month. If you have any questions about game difficulty or you disagree and you want to start a discussion, feel free to leave me a comment and we can have a chat. Until next month, take care.

Hi all, welcome back to the Kana Quest Devblog!

A whole lotta stuff has been happening for Kana Quest this month so lets get to it!

Firstly is THE NEWS. There is only one really big piece of news and it came at the end of Melbourne International Games Week last month. Now I had known about this for a while, but I am now officially allowed to talk about it. Kana Quest was successful in receiving Film Victoria Funding in the most recent funding round! I’m really proud of myself for getting this funding, there were a lot of awesome games asking for funding in this round and I was one of the lucky ones to get through.

Here’s a link to the official announcement: http://gamesweek.melbourne/film-victoria-games-investment-greenlights-14-new-projects/

But enough tooting my own horn, onto the new stuff! And as of this month, I can say that Kana Quest’s background art is now 100% complete. Last month there were two more worlds needing to be completed. Well, they’re done now!

world12Complete.gif

So this is world 12 in the game, showing off the parallax effect. So the idea behind the last three worlds was a three part story of a Kaiju (Godzilla type monster) coming to Japan, getting into a fight with a big Mech, and then the aftermath. World 12 is the the fight with the Mech. A couple of small details with this piece. The buildings in the background are the same buildings that appear in World 9 which were based of the main street in Akihabara. These buildings though were scaled down, had their colour changed and had a bunch of bits torn out of them to show the impact the fight was having on them. Also the Mech has a カ on its chest with is the Katakana for “ka” and the Kanji for power (Chikara). I was also going to give the Mech and the Kaiju simple idle animations, but the animation for them and nothing else looked weird. I also chose this colour pallet to make this world feel dangerous and scary. A lot of villains from TV shows have a purple and green colour pallet so I decided to lean into that. Also this world is the first time I’ve used outlines in Kana Quest’s backgrounds. Choosing if you are going to outline in pixel art is one of the biggest stylistic choices you can make, and I decided pretty early on that I wouldn’t use them for the majority of the backgrounds. But As I wanted to draw attention to the Mech and the Kaiju in this world I broke my usual rule.

world13ProcessGif.gif

world13wipBorderOff.png

And here we have, THE FINAL WORLD. So the conclusion to the three world “story arc” is that the Mech has defeated the Kaiju and stands victorious looking to the sun. But in the foreground we see the destruction that the fight has caused. A couple of notes, this scene was definitely inspired by FLCL and the scene where Haruhara Haruko leaves at the end of the series. It had everything I wanted from the final world, it had dramatic imagery and it was used to close one of my personal favourite shows (don’t watch the second season though, its awful).  I also decided to change the sky for this world. Every previous world has had a gradient for their sky. And that gradient was achieved with dithering so I could keep my colour count low. But for this final world I went with a flat off white with a bright red sun in the middle of it so that it would look extra unsettling next to the other worlds, but also to mimic the Japanese flag. I also talked briefly about how I have generally avoided outlines in the backgrounds. In this world I deliberately broke that rule to further hammer home that this world is not like the others. The final little detail that I put in here is the dog at the front. He is my actual real life dog. He always looks very dramatic so I thought he would fit right at home in this world.

Next up is how the game is progressing in terms of Mechanics. And I can say, now that Reuben has been working on the game for a month, very very well! Since coming on board he has cleaned up a bunch of code behind the scenes, added in FIVE mechanics into the game. This brings us up to 9 out 13 mechanics in the space of a month! And now that the world art is done I have even started making art for some of these mechanics.

GhostKanaDemo

This is a Ghost Kana. Ghost Kana, cannot move or match with other Kana. Also you might have noticed, they don’t have a Hiragana/Katakana on their head. This is because once you make a group of Kana with a size equal to a Ghost Kana’s number, they will come back to life as a normal Kana. This is got some great play to it especially when you add in some of the other mechanics. Once all the levels for this mechanic’s world are done I’ll do a break down of this mechanic on how it can be used and how much depth it adds to the game.

So anyway, that’s basically all I have for this month. If you have any questions, please don’t hesitate to ask. Until next time, take care of yourselves and have a good month!


Hi all, I’m Theo, the lead designer of Kana Quest. I’d like to introduce/reintroduce you to the Kana Quest DevBlog.

Why do I say “introduce/reintroduce”? Well the answer is this is the first Devblog I’ve done for Kana Quest in a while. And Secondly this will be the first Devblog that I will be sending it to everyone who has signed up to the Kana Quest mailing list. Which is something I am going to be doing from now on. And because I am going to be sending these blogs out on the mailing list, I am going to be making a few changes. Mostly being that I am not going to be posting these weekly like I used to. I don’t want to spam the inbox’s of people, and doing one a week was too much for me. So from now on, there will be a new Kana Quest devblog on the second Saturday of each month.

So for those who are new here, what can you expect in these devblogs? You can expect updates on how the game is coming along. Bits of news, interesting things that I’ve learned from making this thing, new features, and my general process.

So I’d like to start with the news. Lets get the bad news done with first, unfortunately Kana Quest will not be exhibiting at PAX Aus this year. Which to be honest is really bumming me out. What happened was that I was waiting for an inflow of cash before I booked a booth this year. And by the time the money came in, all the spots had been taken. If any of you were looking forward to playing the game there, I’m so sorry to have let you down.

But with the bad must come the good! And the good is that Kana Quest is no longer a solo project! I have my team member to come onto the project and I couldn’t be happier. As of this week the wonderful Reuben Covington is now the lead programmer for Kana Quest.

IMG_0277

Here’s Reuben helping me set up for AVCon (Anime Vid Con in Adelaide) earlier this year.

Reuben is an incredibly talented designer and programmer whospecialises in Collectable Card Game designs (and is also currently working on Infinity Heroes which you can check out here –> https://www.kickstarter.com/projects/elphie/infinity-heroes-competitive-card-game-for-mobile-p ). The reason why I think was my choice was because he has an incredible knack for bottom up design work. This is the sort of design that starts with a mechanic and iterates onto it to create great gameplay for the player. Whereas I am a Top Down designer. I start with a desired end goal and create mechanics to achieve the desired end goal (e.g. Wanting a puzzle game that teaches Hiragana/Katakana without any rote learning or pop quizzes). Both of these approaches I believe are super important, but they both have their drawbacks and strengths. Because of this, I am certain Kana Quest will be a better game with Reuben’s input. And hopefully, with his help, Kana Quest will hopefully be finished far sooner than later.

Speaking of Kana Quest being finished, when is that going to be? Well I know at PAX Aus last year I said that it would be in 2018. Sorry that’s not going to happen. But I wasn’t far off. The plan is to essentially finish the game in the first quarter of 2019. And now with Reuben’s help, I’m more than confident we can bring the game to you then!

What makes me so sure I hear you ask? Well for one thing, in terms of art assets, the game is a little over 80% complete! And for me, the most time consuming art assets to produce are by far the world art that go behind the puzzles. As of this week I have finished 11 out of 13. At my current estimates I am planning to have finished all the art by the end of October, or by early November at the latest. Speaking of art, here’s the world art for worlds 8-11.

World8pogoCat.gif

This one, was inspired by John Brack’s Collins St, 5pm. And you know… rush hour in Japanese train stations.

World8-9Transition.gif

Oh and this one is of the main street in Akihabara (The nerd capital in Japan). Along with some not so subtle Vaporwave jokes.

world10.gif

This one I mostly wanted to capture the feel of how lights reflect at night in big Japanese cities.

world11.gif

And this one is the obligatory reference to Hokusai. Fun fact, all games set in Japan by law legally have to include some reference to the Great Wave. *previously stated “fun fact” is in fact a fabrication*

I’m really proud of all the art that I’ve made for Kana Quest so far and I feel like I’ve come a LONG way as a pixel artist since I started. And I can’t wait to show you all the last two worlds. I am going all out for them.

But speaking of my pixel art coming along a long way since I started. For some of you who might have seen Kana Quest at PAX last year you might not have seen that I have changed the logo. Why is this? To those of you who’ve seen the game at an event this year, this will be the same logo that you’re used to. And if that’s the case, no I’m not going to upload the old logo because I don’t like it, and I like this new one much more.

KanaQuestLogoGifBorder

See, isn’t it pretty? I know I should be humble, but this logo was a lot of work and revision and I’m still kinda amazed I made something this cool.

This basically all I wanted to share with you all today. If you have a question about anything to do with the development of Kana Quest, please feel free to ask about it. I’d love to answer your questions. If you’d like to see more regular updates, you can follow the development on these social media channels:

Until next time, take care and have a wonderful day.


Hi all! Welcome to the DevBlog for Kana Quest, where I document what I’ve been working for the week, and what I’ve learned along the way.

This week I did something I’ve never really had to do for Kana Quest before, and that is draw people in pixel art using very limited amounts of pixels. So this week we will go through the things I made and what the process for doing so was.

But firstly let me give you some context on what I’m making this for. So each world in Kana Quest has its own unique layered background art that repeats so that I can make use of parallaxing. I’m currently working on world 8 which is a homage to John Brack’s 5pm Collins St.

This slideshow requires JavaScript.

You can see in the original there are two rows of people. I’ve finished the first one, and am up to the second. And this is where this weeks topic comes in. See the people in the second row are going to be much smaller than the ones on the foreground and thus I have way less pixels to work with.

 Each of these people range from 21-39 pixels wide and 61 – 88 pixels tall. In other words they are all way smaller than any of the people at the front. Quick heads up, I’m not going to go over how I arrived at my pallet for these people. I’m going to focus on the drawing aspect for this week.

So where did I start with these? Well I started each with an idea of what the person should look like at the end. I know this sounds silly but just having an idea of what you want them to look like will help. I also made a conscious effort to make sure they would all look different from each other. But once I had an idea of what I wanted I would start with the head.

w8PersonHead

I wouldn’t go for anything super detailed, just a roughly head shaped blob. Then I would figure out what shape the head should be using what I was planning and using reference photos. Always use reference photos, if you are anything like me and have the imagination of a gold fish they will be your best friend. For this blog we are going make a caricature that you will probably recognise from sailor moon: the nerdy schoolboy with massive glasses.

neeeeeerd

Gurio Umino from Sailor Moon

For this character, I figured he would have a pretty large and round head. Which also helped create room for his big glasses. I also gave him a bowl cut to make his head even more ball like. Something that I noticed very quickly making these characters is when you have this few pixels shape is really important. You have to express as much as you can from the rough shape of things. This is why I chose glasses boy here as the example for this blog.

w8PersonHead

Once I had the rough shapes blocked out (the face, hair and glasses) it was just a matter of shading everything to give him depth. Now I am not using hard outlines for these people. You are free to do that for your own pixel art if you like, I’m opting not to because it is not in style for Kana Quest. Another thing to pay attention to while shading is to use your shading to imply shape and texture. For example on the glasses I use shading to show how thick and bulky they are. I also use skin shading to show the curvature of his face.

But of course this is just the face. As I said before, for each of these characters I started with the head and worked my way down. The reason I did this is because by starting with the face I can get a good sense of what sort of personality I want to depict. In the case of this one, I wanted him to be pretty stiff and awkward looking. I also wanted him in the classic Japanese School uniform winter blazer. So what I did is I created a basic shape of his body; in this case a rigid rectangle. Then I placed where the hands and feet would go. It’s always easier to place where you want the hands and feet to be and work back towards the body than the other way round. In this instance the hands and feet were just straight next to his body, so it would have been pretty simple either way. Then I drew in the outline of his blazer and finished with shading. Once again keeping in mind that we need to use shading to help the viewer infer what the shape of everything is.

w8PersonBody

And there we have it! A finished person. Now if you excuse me I have another five of these things to make before I can finish making this world.

Anyway I hope you’ve enjoyed this week’s devblog. I unfortunately wont be uploading a devblog next week as I will be exhibiting Kana Quest at this year’s Animaga in Melbourne. If you are coming, please come find me at in the indie game section, say hello and give the game a shot! But until next time, take care and have a great week!

Hiya, welcome back to the Kana Quest Devblog. And this week we are looking at what went down at this year’s AVCon.

I went to AVCon last year, and it was the first event I ever took Kana Quest to. And I had an amazing time. If you have a game that you’ve been working on, and you want to show it off I cannot recommend AVCon enough. It’s a friendly crowd, its in a great venue, Adelaide is a lovely place and what’s more the barrier to entry is exceptionally low. Most events cost money to attend, but not AVCon. They do have a right of refusal, but they don’t mind if your game is a bit rough around the edges. Both times I have gone, I’ve seen student games as well as game jam games being exhibited. So, if you are in Australia, and can afford tickets to Adelaide, along with accommodation, do not overlook AVCon.

So this year I went with my mate Reuben. He helped me exhibit at PAXAus last year and is doing some contract programming work for me for Kana Quest. We both met up at Melbourne Airport for our flight on Wednesday. One small piece of advice is to get to these events early. You do not want to arrive on the day of set up and run to the event hall. Because we left on Wednesday, we had all of Thursday to patch bugs and double check everything was running smoothly. Another advantage getting there early is that we had time on Friday to buy supplies for the booth. If you are EVER running a booth at an event like this, here are some things you should have.

  • Hand Sanitizer
  • Water (a lot of it)
  • Snacks
  • Decorations for your booth.
  • Strepsils / Some other throat lolly
  • Anything that brings you joy in dark times.

You will be surprised how much talking you will do during these things, if you don’t have ample water, and strepsils you are going to lose your voice. You are also going to burn through your energy reserves very quickly so make sure you have snacks to keep you going. This year there was a printing error in the booklet that said the indie game section would be open until 7 and not 6. Reuben and I had all these provisions, and yet we looked like this at the end of day 1.

IMG_0293.JPG

And never underestimate how much just a little bit of decoration will do for your booth. We had a small printed poster from Officeworks, some fairy lights, some black backing board, and some dark blue fabric we bought from Lincraft. Which took our booth from this.

IMG_0277.JPG

to this.

IMG_0287.JPG

See how much of a difference that makes? This wasn’t a super fancy setup either. Everything was being held together by gaffer tape. That backboard was literally being propped up by surplus water bottles that we had. Remember as long as the audience cant see the bugs, you can pretend they don’t exist.

But how was the event its self?

Well it was pretty good, we had lovely neighbours next to us. We had The Caves of Atman DX on one side and Spacetug on the other. We also had Brief Battles and Primordial’s Fireborn across the isle from us. I hadn’t met most of these devs before, but they were all lovely and we had a blast chatting to them and playing their games throughout the weekend (Although I had met one team member of Fireborn a week or so prior). Please check out all of their games, they are all super cool and tonnes of fun!

We also had a bit of media coverage, which I am never going to say no to. Once their articles are written up I’ll edit the links into this blog post, but until then we will just have to wait.

But honestly that’s about it. We went to the convention centre, people played Kana Quest, we talked a bunch, and then we collapsed with exhaustion in our Airbnb at the end of the day. All in all, I love do love AVCon. Hopefully Kana Quest will have launched by the time AVCon comes around again and thus I probably wont be exhibiting next year, but its always a good time. But before I leave you have a selfie of Reuben and I on the plane home.

IMG_0303.JPG