Archives for posts with tag: Hiragana

Hi all, its another month and that means its time for another Kana Quest DevBlog!!

Like last month I have just been working on levels. But the big difference between this month and last month is that I am now SO CLOSE to finishing all the levels in the game! There are 13 worlds in a Kana Quest, I have finished making levels for 11/13, and the 12th world is more than two thirds complete. So we are in the home stretch here folks.

At this point I have had a chance to work with all the mechanics in the game and I thought it would be fun to talk about each in depth about the positive and negative elements of each.

mystery

And oh how the mighty have fallen. This is a Mystery Kana, and they were the first mechanic I made for Kana Quest, and I was so proud of it at the time. And I still think its a valuable thing to have in the game, but the more I used it the more utterly irritated I got when I play-tested any level with them in it. So why did I make them? Why are they important? And why are they so irritating? So I made Mystery Kana because I was having a very specific problem, players weren’t flipping over the Kana to learn the pronunciation to complete the levels in the first world. This is problematic because it would render the entire function of Kana Quest meaningless. So I needed a way to effectively force the player to look at them. Mystery Kana do that very well. They just also irritate the player at the same time. The way these things work is they cannot move, but can match. The player needs to keep track of what each Mystery Kana, does and does not match with. Then using that information, figuring out what the Kana’s true identity is. The biggest problem with Mystery Kana is they just simply break the flow of the game and force you make non optimal moves to figure them out, and then you can complete the level. The end result is they start to become a nuisance after a while, and its for this reason they get phased out after world 4.

OneD

The One Directional Kana have been a solid work horse throughout development. There are so many things about this mechanic that are excellent from a designer’s perspective. 1st is they are easy to understand from a player’s perspective. The arrow shows you what they do; they only move in one direction. 2nd is they have a huge amount of design space. Design Space is a design term for talking about how many different interesting configurations a mechanic can be used in. And these Kana allow for so many interesting levels to be made. I am still finding new and interesting ways to use these things even in the 12th world. They are also very flexible in how they can be used. If you want to build an entire level around them, you can and it will probably be a really fun level. But you can also just throw one of these into a level to help guide the player towards the solution. I suspect once I have finished making levels, and I’m in the polishing stage I will end up adding a lot of One Directional Kana for this exact reason. What’s more is they also have interesting interactions with basically every other mechanic. The only complaint I have against them is they can be very punishing of mistakes. The reason for this is if you move one spot too far and then make a bunch of other moves, you end up spamming the undo button more than is ideal.

IceDemo

The fourth world’s mechanic is the Ice Kana. These Kana will keep sliding in the direction you move them until they make an invalid move. These Kana are a good mechanic, but no where near as easy to work with as the One Directional Kana. They have a large amount of design space, they have interesting interactions with most other mechanics, and they can make some very fun levels. But the problem is that you can’t just through one of these into a level. Even if the Ice Kana is supposed to be a minor element to a level, you have to build the entire level around the Ice Kana to accommodate it.  This is not a bad thing as it allows you to create a nice change of pace for the player at points, its just something that needs to be treated with care. Another small problem is they tend to demand levels be a fair bit larger than a similar level without them would be. Other than that, I think Ice Kana are great.

SlimeKana

The Slime Kana are another mechanic in a similar vein of the Mystery Kana as they both play around the sound matching aspect of the game. And so what they do is they will change the vowel sound of any kana you use them with. However unlike the Mystery Kana, these do not get highly irritating after a while. The main reason for this is that they often feel like they are helping you, rather than getting in your way. And because of this is they can just be plugged into a bunch of levels to add a little bit extra. But the biggest weakness of them is that they struggle being the core element of a level. Where the Ice Kana can’t help but be a diva, the Slime Kana struggle with it. Another problem with the Slime Kana is that because the Kana that appear on them can only be Slime Kana it does mean that the Kana on them just get seen less than every other Kana. But the gameplay of them is still solid enough that I made two variants of them.

 

GhostKana

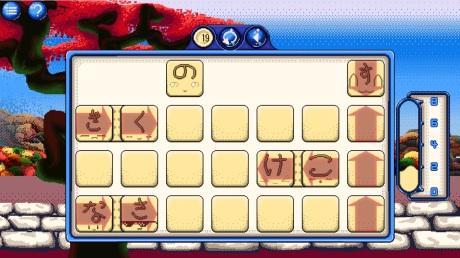
This is a Ghost Kana. Ghost Kana, cannot move and cannot match. But they will come back from the dead once the player has made a group of Kana equal or greater than the number on their head. This is a tricky mechanic. And honestly they represent the biggest disparity between what its like to work with them, compared to what its like to play with them. Because playing with them is honestly pretty good. They make interesting scenarios, and force you to think about the level in a different way. But from a designer’s perspective these things are so hard to work with. You have to engineer levels so carefully around these to make them fun for the player. They have very limited amounts of design space too, so I honestly struggled to finish the world where these were introduced. And what’s worse there are some mechanics that this straight up does not work with.

YaSlimeKana

So this is the first of two Slime Kana variants. This is a Blue Slime Kana. Blue Slime Kana are different because they only ever attach to Kana that end with an “i” sound… and they add an additional vowel to match with rather than completely changing the vowel. This is because of an actual function in Japanese. See Blue Slimes can only have the following letters や/ゆ/よ. And these letters can attach to other letters to make slurred sounds. For example き(ki)+や(ya) = きゃ(kya). So きゃ will match with “i” ending kana, “a” ending kana and “k” starting kana. This makes the mechanic quite satisfying for the player to use because it opens more doors for them than regular Slime Kana do. And its for this reason that they can be a bit frustrating to design around as a game designer. Another problem with them is they have to attach to a kana that ends with an “i”. This over the course of the game makes “i” ending kana being over represented in comparison to other kana. Whats more is that often you have to design levels in which fully utilise the multiple vowel sounds. But this often leads to further exacerbating the over represented “i” problem. But other than these issues, these kana have all the strengths of regular slime kana. And they allow me to illustrate an important part of reading Japanese.

Paralysis These are the Paralysis Kana. They can be moved once… but after that they turn to stone and cannot be moved. These are probably my second most useful mechanic, just after One Directional Kana. They allow for interesting level design, and they have a good amount of design space to them. Not quite as much as One Directional Kana, but still a large amount. They are also very easy to understand what they do. And they can be the focus of a level, or be used as a back up element. The biggest problem that they have though is they have a hard cap on how difficult they can make a level. This isn’t a bad thing as it does mean it’s basically impossible to make a level that is too difficult with these but it does make them a bit more restrictive as one might like in later levels.

Transform

Transform Kana are pretty straight forward. Then can become any Kana, but they can only be one Kana at a time. This mechanic probably has the least frills of any of my mechanics, and you what that’s ok. It works just fine. They ask a simple question of the player, and that question is “where am I needed, and what do I need to be?”. So the trick to designing around these Kana is making sure there is a spot that can only be connected with a Transform Kana. Which is fine as long as one is careful with the other Kana that are used within the level. If you aren’t careful the player will just plop the transform kana anywhere and not have to think at all. They also suffer the same problem that Slime Kana face in that they struggle to be the focus of a level, but they do slot into lots of levels pretty easily.

MaruKana

Here is the final Slime Kana variant. And this is yet another instance of me basing a mechanic off an actual function in Japanese. There are small added strokes called “tenten” and “maru” for Hirgana and Katakana. These will change the consonant of the letter they are attached to. In the game this often is something that is a disadvantage, not an advantage like the other two Slime Kana. Because of this you cannot finish a level if there are any Purple Slime Kana left in play. This forces the player to find the part of the level that can accommodate losing its consonant sound. Basically everything that applies to the first two applies to this one.

  DickheadKana

This is an “n”. Because they don’t share a consonant or a vowel with any other Kana they cannot match like a normal Kana. So I decided to make them the Unfriendly Kana that all other Kana hate. So for as long as an “n” is in the level, you cannot complete it. So how do you get rid of an “n”? You dump them into a rubbish bin. Which looks like this.

Bin

Once an “n” is moved into a rubbish bin both are removed from play, and the spots they occupied become empty spaces on the board. This mechanic requires a fair bit of set up to get working, but once you set up a level to accommodate them its a solid mechanic that has a solid amount of design space. One unique problem with this mechanic is using effectively uses up twice the amount of space that a regular Kana would. Because of this levels with this mechanic tend to look very cluttered and can be a bit difficult to process. Outside these problems they are a solid mechanic that just needs a bit of preparation to make work.


Finally we have Kana Sliders. The art for these is still under way, but what these do is they move every Kana in a row or column down one spot as long as there is an empty spot on the board in that direction. This is a very easy mechanic to design around and offers a lot of design space that had not been available for me for most of the game. Because Kana Sliders care about empty space, it allows them to interact with Slime Kana and Unfriendly Kana that no other mechanic has been able to do so far. The biggest problem with them however is they tend to make levels with ridiculous amount of moves required to complete them. There are levels that require more than 70 moves to complete with this mechanic. This can be problematic especially if the player makes a mistake early on as they will be punished especially hard for that error. Other than that issue, I love working with Kana Sliders.

And with that this weeks Kana Quest Devblog comes to a close. Next time I think I’ll pick out a handful of choice levels, analyse them, talk about how I made them, and talk about why I think they are special.

Hi all and welcome back to the Kana Quest devblog!

This last month was a busy month for Kana Quest development because for the first time, we’ve had to deliver to an “official” deadline. There have been unofficial deadlines before, like PAX and AVCon last year, but those deadlines were a bit fuzzier. They were more “make sure your game is in a presentable state by this time” sort of a deal. This deadline was much more concrete.

So what was this deadline? Well as a part of receiving funding from Film Victoria I have to complete milestone reports to prove to them that their money is being well spent and that I am on track to completion. For this milestone I said I would have the game’s art complete, and the game’s mechanics complete. And… we got there. All that remains at this point in time is bug fixing, level design, tutorials and balancing. That’s actually still quite a lot of things but lets not focus on that. Let’s focus on fun stuff. Like the full list of all the different kinds of Kana in the game!

STONE KANA: These poor kana have been turned to stone, and thus cannot move.

CtStoneHa


MYSTERY KANA: Look at these shifty looking Kana. They’re hiding something… Oh wait they’re hiding their true face! Pay attention to what they do and do not match with to discover their true identity.

mystery


ONE DIRECTION KANA: These Kana can only be moved in one direction. They have a big arrow on their head showing which way that is.

OneD


ICE KANA: These Kana have been encased in super slippery ice. They will keep moving until they can’t. Getting them to go where you want can be challenging.

IceDemo


GHOST KANA: These kana have lingering regrets. Mostly not wanting to pass onto the other side. But that’s no problem, you can bring them back to life if there’s enough friendship to go around. Make a chain of Kana the length of the number on a Ghost Kana’s head and they’ll come back!

GhostKana.gif


SLIME KANA: These gooey Kana don’t like to make friends. But they do like helping other Kana! Attach one of these Kana to any other to change their vowel sound!

SlimeKana

PARALYSIS KANA: These Kana are sick! You can move them once before they turn to stone!

Paralysis


BLUE SLIME KANA: These Slime Kana are a bit picky in which Kana they help. They will only help Kana with an “i” sound. But once they are attached the affected Kana will have two different vowels to match with other Kana. This mimics how the “y” sounding letters in Japanese attach to “i” ending kana to create blended sounds.

Eg. (yo) よ + (ki) き = (kyo)きょ (as in Tokyo)

YaSlimeKana


SHAPE-SHIFTER KANA: These Kana can become anything! Whatever you need them to be, they can be it!

Transform


EVIL SLIME KANA: These Slime Kana nice like the others. They are angry and will stop you from completing a level unless they are attached to another Kana. But they make it harder for you to match with other Kana. This mimics the tenten and maru symbols in Japanese. You attach these symbols to letters to change the consonant. E.g. a (ta) た becomes a だ when you attach those two dots called tenten to it.

MaruKana


JERK KANA: This kana is called “n”. “n” for “n”obody likes them, because they are a jerk. They’re mean, they call the other kana names. They are so unpleasant that other kana cannot be happy if there is one near them. Fortunately there is a way to get rid of them. Move a jerk kana into this little portal thing and they will GO AWAY. Where do they go? Don’t worry about it.


And that is all the Kana! Its been a long road getting all of these in the game, and I can’t wait for you to figure out all the puzzles they are going to make.

Anyway, I’ll see you in the new year! Have a happy and safe holiday season, and from me and the Kana “明けましておめでとう” (Happy new year in Japanese)trailerWIP2


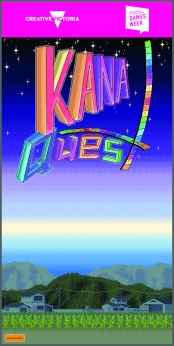
Hi all, welcome to the Kana Quest Devblog. This week I’ve been working on making Kana Quest a new logo. Now I’m not going to show the new logo here until it’s 100% done and its been submitted for its trademark application. But I am going to talk about some of the issues I’ve had with the original logo, why pixel art logos are so hard to make, and some of the visual language I’ve learned this week.

Original Logo Issues:

So, lets have a quick look at the original Kana Quest logo. And go over why I’ve concluded this isn’t a very effective logo.

KanaQuestTitleScreenImg

  1. It doesn’t have a clear and readable silhouette. English speakers are strange as most of our ability to quickly identify words come from a word’s silhouette. Because this does not have a clearly visible shape, it is really hard to read at a distance. Give it a try now, stand back from your computer or phone and try read this logo. You probably can’t it all just appears as a blob of different colors.
  2. It is massive in terms of pixel usage. This logo is not small. and it is not scale-able to smaller sizes. The problem with this is that many store fronts have strict specifications of how big your logo can be. And quite simply, the old logo will not fit those specifications. Not matter how hard I try I will never get this logo to fit into a 231×87 pixel image (the smallest image size used in Steam). Also the fact that the logo is less readable than the “press any key” sign under it is all the more damning seeing as how many more pixels it was given to work with.
  3. You need to speak Japanese to read the full title. Seriously, you would think I would have picked up on that problem when I made this but hey.
  4. Contains very little Japanese visual language elements. I’m not talking about the letters here, I’m talking about the visual features and bits of visual language that are often utilized in Japanese logo making. If I had used these elements then they would infer to the viewer that this game has something to do with Japan even before they see the Japanese written.
  5. Very little contrast to guide the viewers eye. So generally speaking we will focus on the part of an image that has the most contrast in value. If you don’t know “value” is how light or dark a color is.  Look at the greyscale version of the image, there is more contrast in the background that there is on the actual logo. So you spend most of your time looking at the wrong thing.logogreyscale

Things to Do/Not Do When Making Pixel Art Logos:

So, the original logo is bad. Really bad. But if you were thinking making your own Pixel Art Logo what are some things should you do and look out for?

  • This is an obvious one, but I genuinely didn’t do it when I made the first logo; Look at lots of other logos. Find logos with the same the feeling that you want to evoke in your viewer. What are the common elements between those logos? What’s different? How do those differences affect the feeling you get from the logo? Once you’ve done that borrow those common elements and use them in your own work.
  • Draw a bunch of logo’s on paper before you start. I made the first Kana Quest logo going straight into pixel art. This was a mistake. Its really hard to effectively try out ideas when you are drawing within the a constraints of pixel art. Below is a logo I made sketching straight into pixel art within Photoshop. While it is better than the original logo, its honestly half as good as some of the warm up sketches I did in paper this last week. If you find it easier to sketch digitally than physically then do that instead, but do some non-pixel art sketches first.

AnimatedLogo1Gif

  • Beware of overlapping shapes (for example overlapping letters). This is less dire if you have more pixels to work with, but overlapping shapes require a lot of defining so the viewer can easily process what’s on top and what’s underneath. And if you are using pixel art, you might not have the pixels to do this. This isn’t a “avoid at all costs” rule, but it is something to be careful of while you are sketching (Also you might notice that I have overlapping letters in the original logo, and it just makes things harder to read).
  • Check that your logo looks good on many different backgrounds. Its fine to have a background color that makes your logo “pop” the most, but if it looks bad on flat black, white or grey there is a good chance you’ve made a mistake.
  • Don’t go with your first design. Seriously, don’t I don’t know why I decided I thought it was a good idea to do so for the first Kana Quest logo, but it was a terrible idea. Don’t fall into that trap.


Japanese Logo Visual Language:

So while I was doing research for my logo this week I wanted to figure out what were  the most commonly used pieces of visual language used in Japanese game logos. And I ended up identifying three common elements (all of which I’ve utilized in my new logo). And of course, not all Japanese game logos use these elements, but a very large amount do. And they use these elements more often than western games.

To this end, look at the Japanese logos for Pokemon Sun and Moon. These logos are great for demonstrating three aspects of design that are common across a large amount of Japanese game logos.

JapaneseGameLogos.jpg

So the common elements are as follows.

  1. Letter Stroke Border:  So most logo’s will have some form of border around the title text of the game. These borders have a large amount of variation depending on the type of game. The width, the roundness/sharpness, the color and shading of the border are all important of communicating the game’s identity. The reason I bring this up as a feature of Japanese visual design is that it is far more common for there to be no border around the letters in a western game’s logo. For example the logo of Skyrim has just the plain text and no border. Or you could look at Dark Souls: A Japanese game that has a deliberately western looking logo by omitting the letter border.
  2. Subheading: While not as commonly used as the letter border, this is a far more commonly used aspect of design than in western games. The most common use of the subheading is to write the name of the game again in a more easily readable text. Often games with a name written in Kanji or English will have the name written out in subheading in Katakana or Hiragana for this very purpose. Another common use is a brief description of the game or as a visual ” : “. The main variations between subheadings are the placement, and font differentiation. Also subheadings are way more likely to forgo a Letter Border than the main logo.
  3. Visual Flourishes:  These are the least distinctive to Japanese logo design when compared to the first two, but they are an important part of the design. These flourishes are often incorporated into the Title’s letters and often use something emblematic of the game (see the pokeball and the Lunala/Solgleo symbol in the Pokemon Sun/Moon logo).


Anyway, that’s all there is for this week. I look forward to being able to show you the new logo when its safe for me to do so, but until then have a great week!


The devblog is back! Sorry for such a long hiatus, but we are here and a lot has happened!

But today we are talking about World 3. Just before Christmas I finished making the background art and the one direction tiles so I would be ready to make some levels!

World3Level1

All the levels for World 3 are now complete! Something I might do every time I finish making the levels for a world I might “review” the mechanic deployed therein. I’m going to judge a mechanic on a few different criteria. Most of these are normal things to consider for all game design, but the last is relevant specifically to Kana Quest.

  1. Complexity of the mechanic. (How long does it take for the player to figure out how it works? How much mental strain does it cause the player?)
  2. Design Space of the mechanic. (This is another way of saying how deep is the mechanic? How many interesting scenario’s can it be used in? Does it interact in interesting ways with other mechanics?)
  3. Fun Factor of the mechanic. (Just simply, how fun is it)
  4. Ability to help teach Hiragana. (Does the mechanic play help the player to remember what a Kana is or learn new Kana?)

So how did one direction tiles do? Very very well, they have a very low complexity so much so that a tutorial is often not needed for play testers, and it has a large design space! The fun factor is a bit subjective, but personally I find it quite fun. The only strike against one direction tiles; they don’t really teach Hiragana very well. They don’t work against that goal, but they aren’t any more useful than a normal Kana tile.

The only other problem with one directional tiles is they require a large level to be interesting. World3Level20.jpg

Due to a bunch of mistakes that I made when setting the game’s camera up, I have a hard upper limit to how big a level can be. On the whole this isn’t too bad as it forces me to keep the complexity down but it does mean that for mechanics like the one direction tile, I can’t use it to its fullest extent.

But on the whole I give one direction tiles a B+. Its a good mechanic that can be used to make interesting levels.

Before I leave you today, I just want to share my personal favorite level from World 3.

World3Level16.jpg

This what the first of a series of levels that I made where the player has to figure out the correct place to start matching the Kana. In each row there is usually only one Kana that will match with the row above or below it. Thus making the physical size of the level and the positioning of the tiles crucial to being able to complete the level.

World3Level16Complete.jpg

Anyway, I hope you all have a great week, and I will be back posting regular devblogs again from here on out! I will try for once a week, but if I’ve just been squashing bugs that are not very interesting then it will probably get pushed back.

Hey welcome to this week’s Kana Quest Dev Blog. Where I get to talk all about what I’ve been doing for the last week. What I achieved, what problems I had and how I solved those problems for my game Kana Quest (A Puzzle game that’s a cross between dominoes and a match three game that teaches the Japanese phonetic Alphabet).

So PAX Aus is now less than a month away. This means most of my energy is being spent preparing for that. As a result very little new content for is going to be made for the game. I’m patching bugs certainly, but making new content will have to wait for now.

KanaQuestPAXBanner180dpi.jpgKanaQuestPAXBanner280dpi.jpgSo what sort of things are taking up so much time? Well mainly getting my booth ready. I learned from AVCon earlier this year, that your presentation matters. It matters a lot. Thankfully PAX provides printing of artwork included in the booking of the booth which will improve my baseline presentation a bunch. But I do need to make the artwork for those posters. As of this week I can officially say that I have been given grant money by Creative Victoria to attend PAX Aus which is amazing and I of coarse can’t thank them enough. And that bright pink banner topper is part of the conditions of the grant. I have to display the Melbourne International Games Week branding on my booth. Which I am more than happy to do. I also made an English version of the Kana Quest Logo as at AVCon I realized that most people had to ASK what the name of the game is. I want my players to know the name of the game without asking so it was a natural addition.
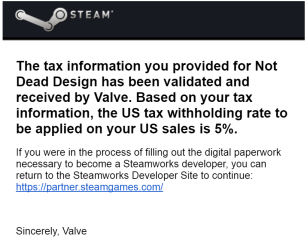
One big achievement this week was this little beauty (please imaging me saying beauty in a really strong Aussie accent).

TaxAccept.pngTurns out getting my tax information verified by Valve turned out to be a bit of a headache. I’ve been trying to get it done for last three weeks and its been very frustrating to do. I do need to give massive shout out to Carmine Fantarella at Games of Edan (Link: gamesofedan.com/icebox-speedgunner#_=_ ) . He provided a bunch of help in this department. So I do want to give thanks where thanks is due. If you like fast paced action games go check out his game ICEBOX: Speed Gunner, its really sweet and just plays amazingly.
So now that Kana Quest is on Steam what’s the next step? Well the next step is setting up my Steam Storefront. This means I need to make a trailer, prepare some HD screenshots and once again make sure my presentation is top notch. Once I’ve done that I’ll submit the game to Valve, they will review it and it will go onto the Coming Soon section.


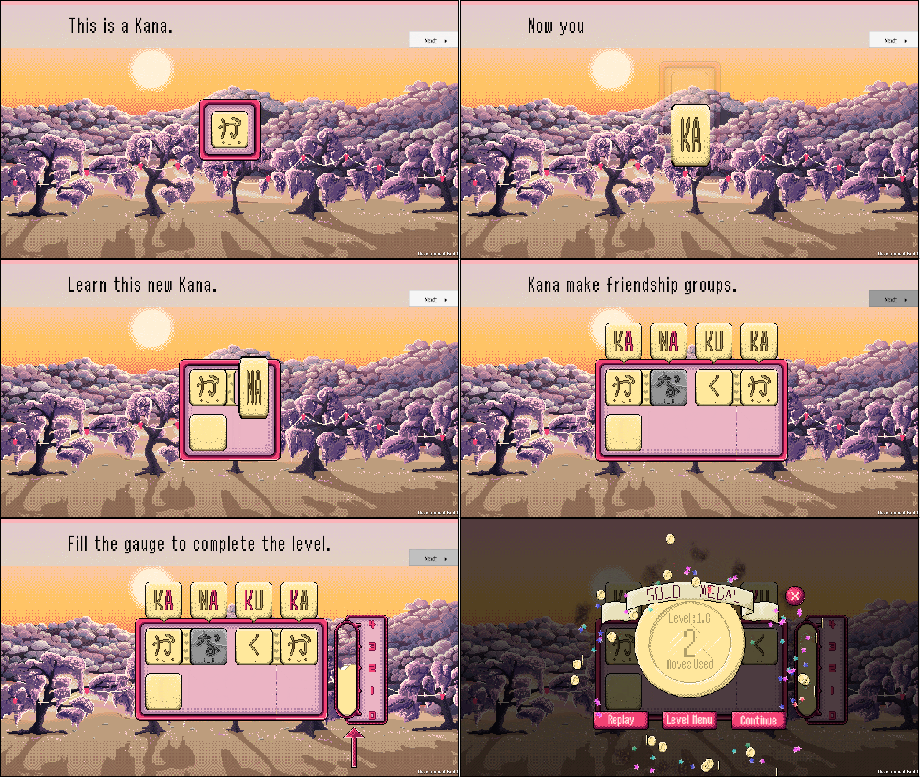
Finally for this week we have the tutorial. For as long as this game has existed teaching players how to PLAY the game. Which is saying something as the first people to ever play the game were two native speakers of Japanese. This week I finally got sick of my tutorials not working so I sat down and made a list of skills the player needs to have to play the game.

  • Know how to flip the Kana to see the English
  • Know how to move the Kana.
  • Know how Kana match with each other.
  • Understand the win state of each level.
  • Know what the undo and restart buttons are.
  • Understand that Stone Kana can’t be moved.

So I went off and made the following tutorial level.NewTutorial5.gif

So this tutorial level does a few things differently to all previous versions. Firstly this tutorial takes place entirely on only once scene. This means I can add new concepts one at a time and those additions will be the focus of attention. It also is much harder to sequence break than previous version. Actually I specifically made it impossible to do so. I can’t afford players who just skip the tutorial as they will be lost. Anyway I need to now playtest this new tutorial to ensure that it’s up to the task of teaching everyone at PAX Aus.

And with that, another Dev Blog comes to an end for another week. If you are interested in Kana Quest please follow me on twitter @notdeaddesigner or follow my blog here on WordPress. I hope you all have a great weekend, till next time.


Hey. Welcome to this week’s Kana Quest DevBlog.

So what have I been doing this past week? I’ve been trying to implement some the changes to the tutorial that I talked about last week. NewTutorial.gif

So above is a new tutorial level that I made this week. There are a few new things here. First is the friendship gauge has been changed to show the size of the largest friendship group. This way it conveys information a bit better. Second I’ve changed the click image to a hand. In play tests with tablets and phones people have been confused by the old mouse. Thirdly is the English text bubbles above the Kana.  I’m doing this so that the player can see the connection between the Kana. Hopefully it will convey the idea that they game is about matching sounds.

21930808_10155250650068541_2091640450_o

The most exciting addition to Kana Quest this week is that of SOUND!!! I recorded my voice actress Aki Nemoto to perform all the Kana tiles this week.  Here is a photo of my dad (a sound engineer) setting up the microphone with Aki. She did a great job, I got the exact quality to the voice that I wanted. Of coarse I do want to say a big thank you to Dad here for helping me record!

Once the recording was done, I downloaded all the files and implemented them into the game. As of the most recent build, if you double click a Kana it will say its name.


KanaQuestMusicManagerBut that’s not all the sound work that got done this week! I also commissioned Nicole Marie T to compose some music for Kana Quest. So far she has finished work on the Kana Quest Theme Song and has done a great job! She is now currently working on the background theme for world one and world two. But in preparation for those assets I have made a music manager. This script will fade the music in and out when changing between worlds and the title screen.
That’s about all I can show you for this week. I’m hoping to get some more play tests done on the new tutorial asap so I can further refine it. Anyway, hope you have a good week and I’ll see you next week.

Hi Welcome to the Dev Blog for Kana Quest. If you’re new here and have never seen or heard of Kana Quest, read this blog post for the Who, What, When, Where, and Why of Kana Quest. –> https://kipentheodor.wordpress.com/2017/09/09/kana-quest-primer/

Otherwise read on to hear about what’s been done over the last week!

So I have one and a half months till PAX Aus hits. And I am officially freaking out. There is so much to do and so little time for me to do it. I still have to get Kana Quest onto Steam so I can take preorders at PAX. I still have to implement some sound into the game. I still have to organize my booth’s set up. There are still some bugs that need to be ironed out. I need to make an awesome trailer to show off my game. And finally the one thing that has me worried most of all, my tutorial is still awful.

The tutorial has always Kana Quest’s biggest weakness. I tried to sit down this week and think about all the common misconceptions people have when they sit down and play.

  • They think they are writing words.
  • They think Hiragana is Kanji and start freaking out they don’t know the meaning of each letter.
  • They don’t understand they are trying to match sounds.
  • They don’t understand the win state.

So how am I going to prevent the player from thinking these things?

I

Don’t

Know

That’s it. The reality is I’m just not sure. But I cannot afford to give up. So here are some ideas I have that hopefully will help fix the problem.

Idea 1. Completion Gauge: So most people when playing are not sure what their goal is. If I give a visual representation of how close the level is to being completed it will better communicate the goal. I think it will help players know how close they are to completing a level, but not necessarily understand why they are completing the level.  CompletionGauge2.gif

As you can see I have already started work on this idea, mainly because I think this is my best one. To get this working though I have had to change how I handle checking whether or not the level is complete. Now the game will find the largest group of Kana in the level. Before the game would only actually check the group size starting from one location. I had to change this as if that starting location was the last to be connected it would be very easy to have a situation where the gauge goes from zero to full which would only confuse player further.

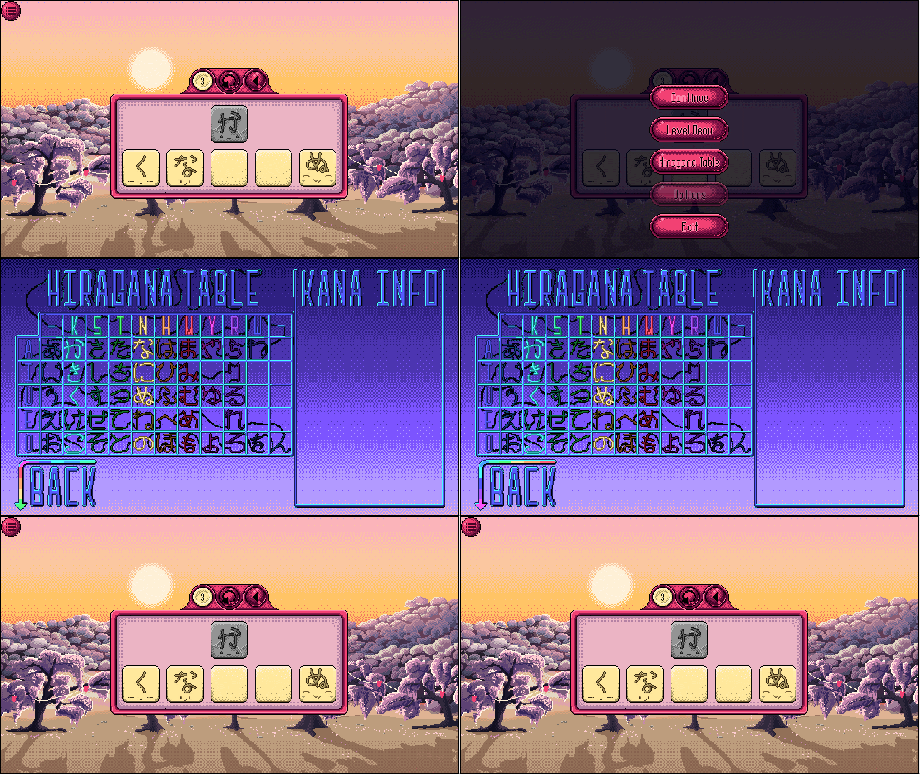
Idea 2. Show the Player the Hiragana Table: So the idea here is to show the player the whole Hiragana table after they learn their first three Kana. Hopefully this will demonstrate to the player that Kana are phonetic letters and not Kanji (which are pictorial). The other great advantage of doing this is I prepare the player for all the characters that they will learn. That way they don’t freak out that they are going to have HUNDREDS of Kana to memorize. HiraganaTableGif.gif

Idea 3. Show the English Sounds Matching in Tutorial Levels: The idea behind this one is that the player doesn’t get to see where things are matching. While this is a core part of the gameplay later on, for the tutorial the most important thing is that the player understands the core mechanic. If showing the English for a little bit will achieve this I’ll try it!

Idea 4. Change the Structure of Tutorial Levels: So the idea here is that I increase the size of the early levels but not increase the difficulty. What I’m thinking is a really long level with the same Kana repeating but with stone Kana to limit movement. Coupled with the completion gauge hopefully this will communicate the idea that creating matches is the goal.

So those are my ideas on how to improve the tutorial. They aren’t perfect so if you have any ideas, PLEASE TELL MEEEE! I’ll see you all in a week’s time where hopefully I haven’t turned into a stressed out wreck.

Hey, so you’ve stumbled onto my blog somehow. And probably you landed on a page about my game project Kana Quest. This is because for as long as I’m making Kana Quest I will be uploading a devblog of my process. However most of the devblogs are not great for anyone who doesn’t know what Kana Quest is…. which is you know…. most people.

SO! This is a quick primer on what Kana Quest is, and how it works.

KanaQuestTitleScreen.gif

So what is Kana Quest? Kana Quest is a puzzle game that’s a cross between dominoes and a match-3 game that teaches the Japanese Alphabet (Both Hiragana and Katakana). It will be released on Mac, PC, Linux, Android and iOS.

It is an educational game, but it is being designed to be a fun puzzle game first. This way, people who already know Japanese can still play and enjoy the game. Another key feature of Kana Quest is that there are no pop quizzes. A lot of educational games lean heavily on game-ified versions of school tests in the hopes that no one will notice.
KatakanaDemoThe main gameplay of Kana Quest revolves around Kana. The word Kana comes from the names of the two Japanese Alphabet; Hiragana and Katakana and basically means letter. In Kana Quest, the Kana have been brought to life and want to make friends. Its the player’s job to help them find their friends. Two kana that are next to each other will be friends if their names/pronunciation share a sound. So for example か (Ka) and な (Na) will be friends because they both have an “a” sound. The same is true for か (Ka) and く(Ku) because of the “k” sound. Once you know which Kana can be friends, you need to make a friendship group that includes all Kana in the level.
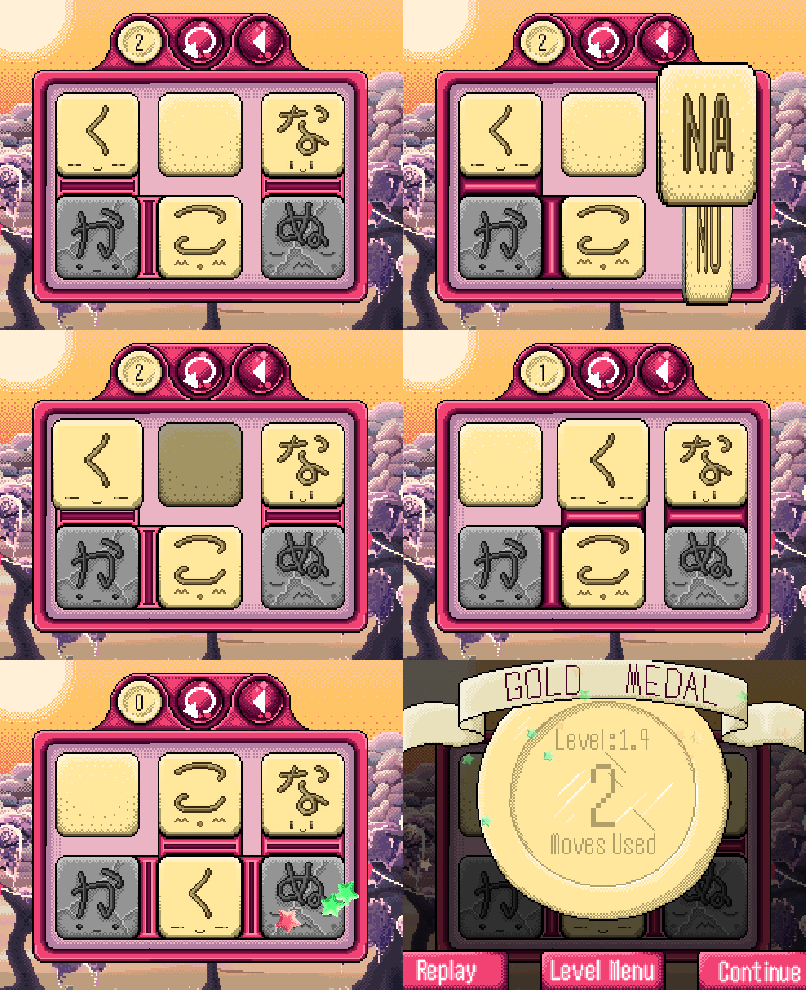
LevelDemo2For example. This level starts off with every Kana having at least one friend. But because these friendships don’t connect all the Kana into one group the level is not complete.
This gif also shows a couple of other important details. The flashing lines between Kana show that they are friends, and a sound matches between them.


Finally a quick description of the different mechanics currently in the game.

Blank Tiles: These can be seen in the above gif. These cannot match, but can be moved freely.

Stone Kana: Stone kana will match with other kana and must be included in the final friendship group but can not be moved. They have been turned to stone, you see.

MysteryTileDemo2Mystery Kana: These enigmatic Kana are hiding their true face. But their true identity is given away by who they become friends with. Unfortunately Kana who are hiding their true identity are not truly happy and must be unmasked before the level can be complete.

Slime Kana: Slime Kana do not have any consonants in their names. Slime tiles cannot move.But they can merge with other Kana. When they merge they change the vowel of any Kana they merge with. Slime Kana cannot match, but they are happy to help other Kana find their friends.SlimeTiles

And that about covers it. This primer will likely but updated over time as new content is added. If you have any questions please feel free to comment, and I’ll get back to you asap!


This week was a big week for Kana Quest because as of writing, all the levels in the second world are complete. So for this week’s devblog we are going to look at how I go about making levels.

Before getting into it I just want to include a quick intro to some of the terms that I will use in this devblog.

Kana: The individual game pieces in Kana Quest. They are also letters of the Japanese alphabets (Hiragana and Katakana).

Match: When two adjacent Kana share a matching sound. Eg. KA N–> Matching “A”. Matches are important as they are how you complete levels in Kana Quest. When every Kana is connected by one chain of matches the level is complete.

Mystery Kana: The main mechanic of the second world in Kana Quest. They are represented with question marks both in game and in hand drawn notes. The player must pay attention to what the Mystery Kana matches with to find out the sound of that Kana.

Ok that’s that. Onward!


So what is step one? The first thing I will do before I make a level is to make a mental note of a couple of things. For example: What kana has the player seen before? What kana have been introduced very recently? How many moves did the last level need to complete? How many different possible configurations did the last level have?

That last one is really important. As it is the biggest determining factor of a level’s difficulty. For example look at the following mock levels.20170902_161642.jpg

Both levels have the exact same Kana, and require the same amount of moves to complete but A is significantly easier to complete than B. And it comes down entirely to the amount of possible configurations of the Kana. One of the first levels I ever made for Kana Quest was a 3×3 level with a Kana in every spot. It only took 2 moves to complete but no one could ever complete it.
20170902_163949.jpg

So once I’ve made a note of how difficult I want the level to be, using a pen and paper I start drawing down the idea of what the level should be like.

You can see this happening here. I start out with an idea for a level where you get two normal Kana to try and figure out lots of different Mystery Kana in the level. (Top part)

Once I realize the limitations of the level concept I rearrange things to ensure the level plays well (Middle part).

Finally I write down the solution to the level and the number of moves needed to get there. (Bottom part).

Once I’m happy with my first draft of a level its time to get it into the game!

To do this I have to give unity (the game engine I’m using) the following things. 1. The dimensions of the level (In this case 3×6). 2. Make a numerical list representing each of the Kana starting from the bottom left of the level.  (In this case the list is 12,47,20,47,47,310,47,307,47,322,47,105,-1,106,-1,108,323). 3. Tell unity how many Kana there are in the level. This allows unity to know when the level is actually complete. Once you do all of this you get…LevelDemo

One level, ready for play-testing! I will usually play the level once or twice to make sure that it is possible and I know the minimum number of moves needed to complete. Then I will give it to play-testers who let me know if the level is too hard or too easy. Then I will adjust accordingly.

If you have any questions about the level making process feel free to ask any questions in the comment section.

That’s me for this week. Have a great weekend all.


Hey, Welcome to this week’s Kana Quest Devblog where I talk about all the work I’ve done during the week.

So this week has been mostly about getting elements of the second world working ASAP. With PAX Aus fast approaching there are three major things I need to get done before then. First is World 2, second is getting it working on IOS and android and third is putting in some sound.

So most of implementing World 2 is done, the only tasks left on the plate is a tutorial for how to move to World 2, a tutorial for the mystery tile mechanic and finally all the levels. I’m trying to finish working on World 2 by the end of August so I have plenty of time to get the other things on my list done.

So I have two GIFs to show off this week. The first is a lock out screen if the player tries to move to World 2 without meeting the requirements.

World2LockedScreen

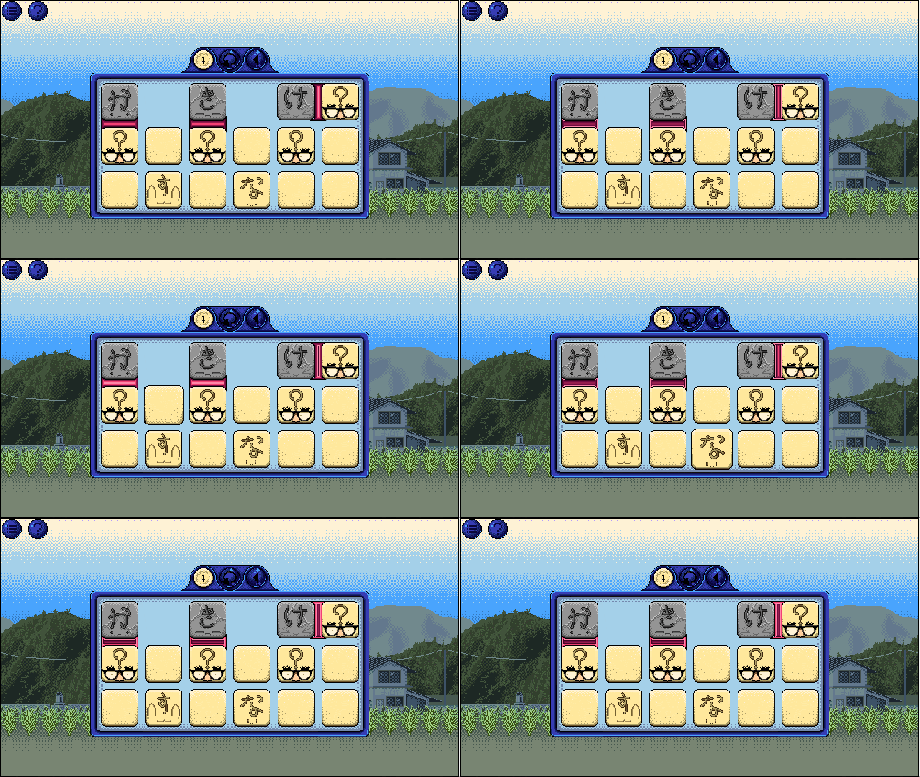
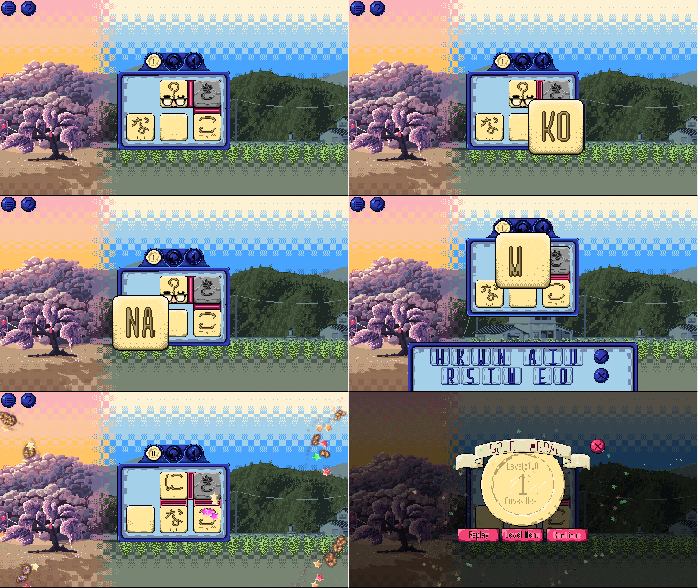
The other GIF for this week is a quick demo of how Mystery Kana work. So mystery tiles, cannot be moved and you cannot see the actual Kana. But they will match like normal Kana do. Using that information the player has to figure out what Kana is hiding behind that disguise. In this gif you can see the mystery matches with Ki and Na but not Ko.  This means that the Mystery tile must have the vowel “i” because if it was matching with the consonant Ko would match.  Then since we know that the vowel is “i” when we see Na match we know that the consonant is “n”. Add those sounds together and you get Ni. MysteryTileDemo2.gif

So there are a few things to keep in mind about Mystery Kana. Even if all the Kana match up if there are any Mystery Kana the level will not be complete. Secondly once you figure out the sound of a mystery tile, it will become a normal tile that you can move freely. This is great because it allows more interesting levels. For example you can make levels that are impossible to complete without unmasking all the mystery tiles.  This definitely increases the design space of Mystery Kana a lot.

Anyway that’s the devblog for this week. Hope you have a good weekend, and I’ll see you next week.